Tynemouth Photographic Society


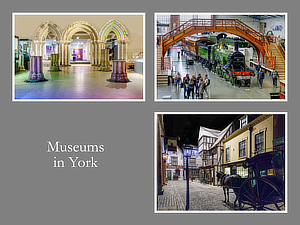
Our Annual Projected Image Competition calls for 3 images on a theme. The theme can be anything of the photographer's choosing. The thing which makes people hesitate is that a fourth image is also required, to name the theme and show small versions of the 3 main images. This is sometimes called a triptych. It should not have any fancy layout because only the 3 main images will be judged. It is just an index for the whole entry, to be shown first. An example is shown on the left here.
On this page we will show how the triptych can be created in Affinity Photo. The steps in other programs will not be very different.
If you really feel you cannot do this there are other members who can help. Ask Margaret Warren.
If any of the following is unclear ask Graham Relf.
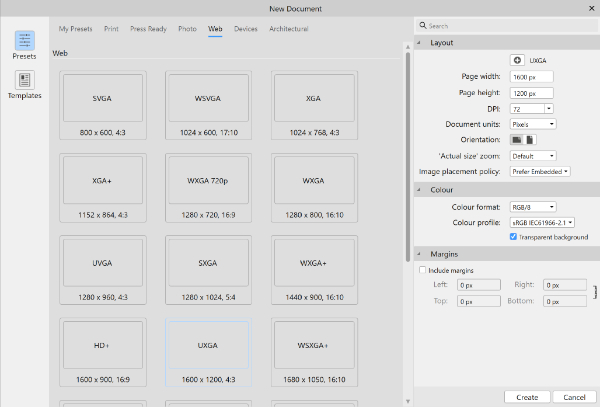
(a) In the File menu of Affinity Photo, select New...
(b) The resulting display has tabs along the top. Select the Web tab and then one of the examples you can click on is UXGA, 1600 x 1200. Click on it, which fills in the form on the right, and then click the Create button at bottom right.
The resulting image is just a grey chequerboard, meaning it is a transparent background.
Note: If in any of the following steps you go wrong, just key Ctrl+Z as many times as you like to get back to a stage when it looked right.
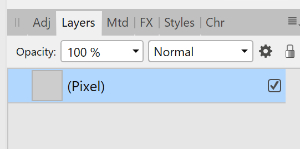
In the Layer menu, select New Layer. Then in the panels on the right you should see a layer called (Pixel).
(a) In the Select menu, choose Select All (Ctrl+A). You should see a dancing dashed line around the chequerboard.
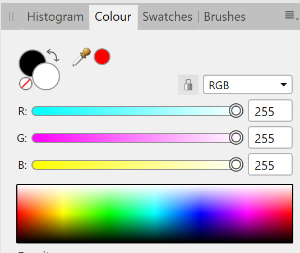
(b) In the Edit menu, choose one of the Fill options. You can see what the primary and secondary colours are in the panels on the right. It is likely that the secondary colour will be black (as shown here) and filling with black will be quite suitable.
(You may like to try choosing a different colour, such as a shade of grey as in the first example at the top.)
(c) Then on the Select Menu again, choose Deselect (Ctrl+D). The dancing line will disappear. You will be left with a pixel layer filled with your chosen colour.
This step will be done three times, for the three images in your entry.
(a) In the File menu, choose Place... This will bring up a dialogue for opening one of your images.
(b) Shortly after clicking the Open button to open your image (it may take a few seconds) you will see an icon which looks like a small arrow pointing down to a blue disc. Click on it but hold the mouse button down to drag out a rectangle that you will see contains your image. Release the mouse when you have a reasonably sized image, as shown here.
(c) You will see that the image has "handles" on it (the blue dots). Drag the corner ones (not the side ones) to adjust the size of your image. You can also click on the image to drag it around to position it. These adjustments are possible as long as the Move tool is active (black arrow near the top of the left-hand tool strip).


This image does not have to show a title, but if you wish...
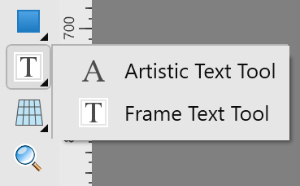
(a) In the tool bar on the left select the Artistic Text Tool (if it's not immediately visible you may need to click on the T to make it fly out as shown here).
(b) Click on the image at the position where you want to start the title and then type it.
(c) If you cannot see any text it is either too small or its colour is the same as the background (black?). While you are still typing you can press Ctrl+A to select all of the text and then use the control bar to alter font size, colour, and so on.
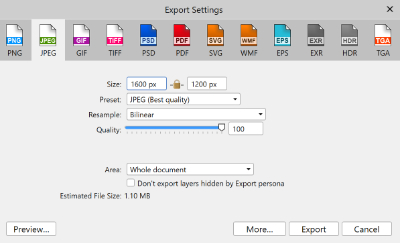
(a) On the File menu, choose Export... (Ctrl+Alt+Shift+S). This brings up a dialogue as shown here.
(b) Ensure the JPEG tab is selected.
(c) Optionally click the More... button to be able to ensure metadata are not saved (which might include your name).
(d) Click the Export button which gives you a dialogue for naming and saving your file. As usual, be sure to take note of which directory (folder) it will be going into.